Automated Testing for Broken Visuals with Microsoft Playwright and Azure DevOps
In my previous article, I explained how to run tests for broken visuals in Power BI using Microsoft Playwright and Visual Studio Code. If you’re looking to avoid the manual process of clicking through each workspace, navigating to every report, and checking each page, this solution can significantly reduce those steps. However, someone still needs to initiate the tests manually. So, how can we fully automate the testing process to ensure it runs on a routine basis and we know when broken visuals appear?
Orchestrate: The beginning-to-end orchestration of data, tools, code, environments, and the analytic teams work is a key driver of analytic success.
Thankfully, the Microsoft Playwright team has provided extensive documentation on integrating tests into various DevOps tools such as GitHub Actions, Jenkins, CircleCI, and Azure DevOps. In this article, I’ll focus on Azure DevOps—a tool I frequently encounter.
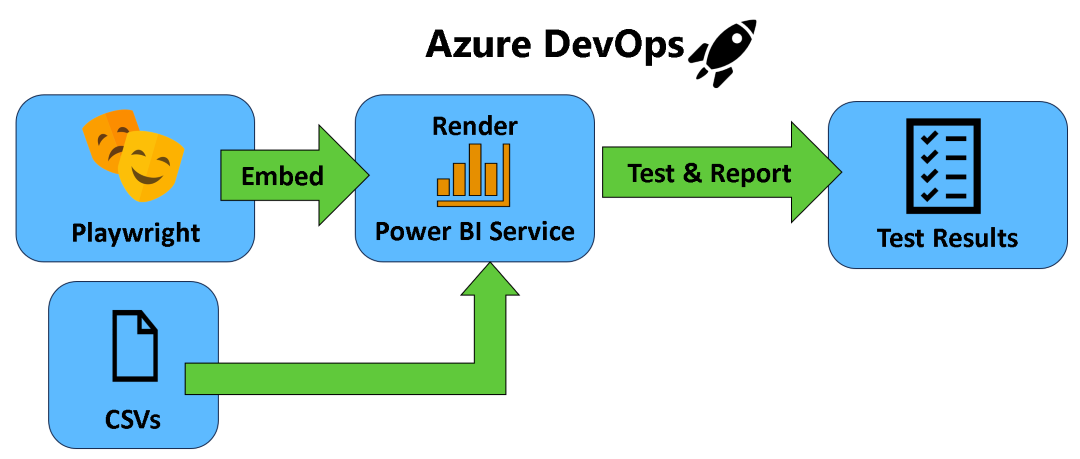 Figure 1 - High-Level Diagram of Testing in Azure DevOps Pipeline
Overview
Figure 1 provides a high-level overview of the Azure DevOps pipeline. To implement it, ensure you have the following setup in Azure DevOps:
1) Integrate the latest test suite release into a repository in Azure Repos. This ensures all code is properly stored. Make sure the CSV files (as discussed in the previous article) are placed in the test-cases folder so the pipeline knows what to test.
2) Create a variable group in Azure DevOps to replicate the variables defined in the .env file. You may notice that the .gitignore file includes the .env file. This is because storing the client secret for the service principal in plain text in your repository poses a significant security risk. By setting up the variable group correctly, you can securely manage these values. Your variable group should contain the following items, as shown in Figure 2:
- CLIENT_ID -- Set this to the Client ID of the service principal you created during the prerequisites.
- CLIENT_SECRET -- The client secret for the service principal.
- TENANT_ID -- The tenant ID for your Power BI instance.
- ENVIRONMENT -- The tenant type (e.g., Public, Germany, China, USGov, USGovHigh, or USGovDoD) where your Power BI service is located.
- CI -- Set this set to true to ensure the pipeline terminates correctly if there are any failed tests.
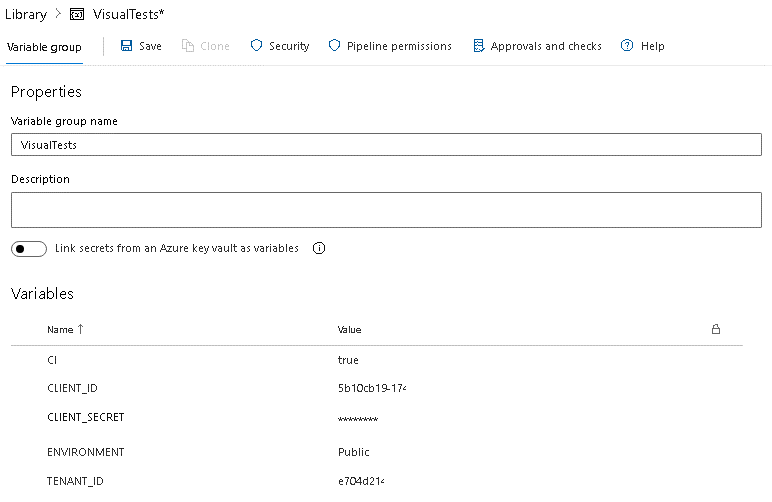 Figure 2 - Example of Variable Group
3) Create a pipeline from an existing YAML file. You’ll be using the playwright-docker.template.yml file for this step. By default, this job will run every 6 hours, but you can adjust the triggers to run at different intervals or based on specific updates (e.g., an update to a semantic model). This pipeline will run on Linux and leverage a container optimized for running Playwright tests. When executed, the pipeline will follow three main steps:
- npm ci -- Installs the Node.js modules required to run the tests.
- npx playwright test -- Executes the tests using the specific configuration file, *playwright.config.v1.ts*, which is customized for the pipeline.
- Publish Test Results -- Publishes the test results to Azure DevOps in JUnit format, allowing them to be viewed in the browser.
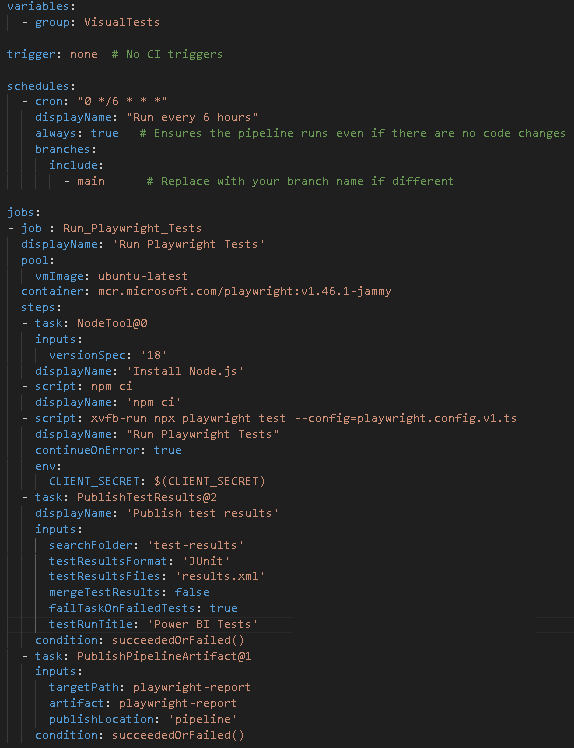 Figure 3 - YAML file for running tests in a Azure Pipeline
With the pipeline in place, test results will be generated during each execution and made available alongside the pipeline results (see Figure 4).
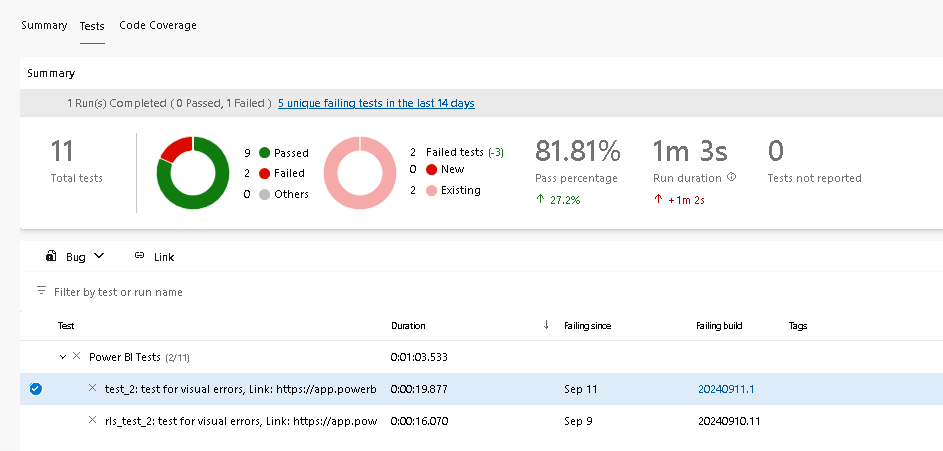 Figure 4 - Example of test results
You can also drill down into the test details and view a screenshot of any failed tests (see Figure 5).
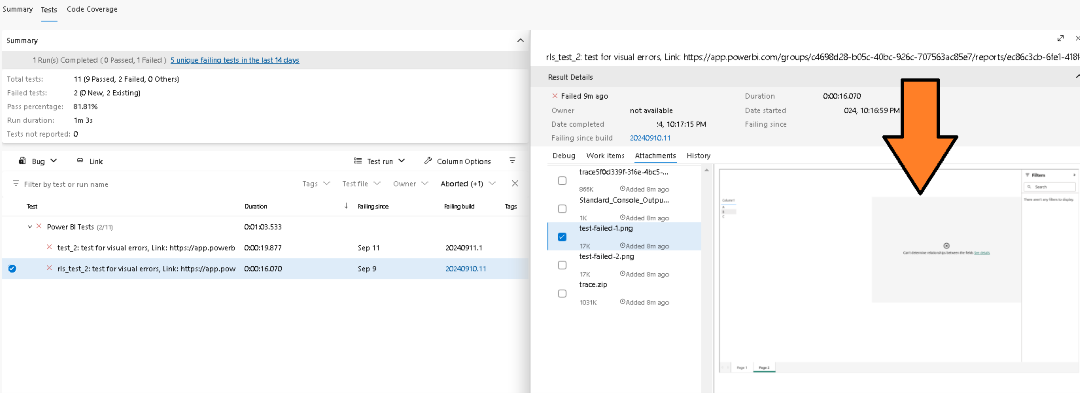 Figure 5 - Example of report with a broken visual
Monitoring
It’s crucial to monitor the new Azure DevOps pipeline for any failures—catch broken visuals before your customers do. I’ve also outlined some best practices for effective monitoring in this article.
Sharing with the Audience
Would you like to try it out yourself? Prachiti and I have made it available on GitHub at this link. We walk you through the specific setup steps and what you need to run it in your own Azure DevOps service.
As always, let me know your thoughts on LinkedIn or Twitter/X on the approach and ways to improve it and the documentation.